Using Python to perform a PKCE exchange
Learn how to perform a PKCE exchange with Authproject using Python.
Today we're going to be learning how to perform a PKCE exchange with Authproject using Python.
Explanation
PKCE is used by client applications to perform authorization code exchanges in a setting where a client secret would not suffice - for example, running an application locally on a user's machine.
How it works
It all starts by generating a code verifier and code challenge. The code verifier is a 64-byte string that is then URL-safe Base64 encoded. The verifier is then hashed using SHA-256, to produce a challenge. The challenge is passed to Authproject (or your IdP of choice) during the authorization code flow. Then, once the authorization code has been received by the application, the verifier is passed during the code exchange to the server. The server validates that the verifier is a valid solution to the challenge (i.e., you can hash the verifier to generate the challenge), an access token is returned, and your application is ready to go.
Attack Surface
This flow is specifically designed to prevent man-in-the-middle (MITM) attacks from grabbing the authorization code during the exchange and presenting it themselves to obtain an access token. Because the verifier is hard to guess from the challenge, it is guaranteed that the process that presents the challenge is the only process that is able to exchange an authorization code for an access token.
Using Python
Let's get started with Python to perform a PKCE exchange.
Dependencies
First, we need to install the Python dependencies. Thankfully, there are only two needed for our application.
pip install requests-oauthlib hashlibImports
At the top of our script, we need to import the following libraries
import base64
import webbrowser
import secrets

import hashlib

from requests_oauthlib import OAuth2Session
We need to use base64 and secrets to generate the code verifier and challenge, webbrowser to open up a web browser window to perform the exchange, hashlib to perform the hashing of the verifier, and OAuth2Session from requests_oauthlib to manage the OAuth2 flow.
Global Variables
To make our lives easier, we are going to define some global variables.
# Client ID, provided by Authproject
client_id = "client-f2655980a4574a01b6a501a20676651f"

# Base URL for authorization
authorization_base_url = "https://<your-auth-domain>/oauth2/authorize"

# Token URL for exchanging authorization code for access token
token_url = "https://<your-auth-domain>/oauth2/token"

# Redirect URI registered with the OAuth2 provider
redirect_uri = "https://localhost:9000/callback"

# OAuth2 scope (optional, depends on your server)
scope = ["openid", "profile", "email"]- The client ID is provided by Authproject
- The authorization base URL is the URL the user gets sent to in order to start the OAuth2 flow
- The token URL is where you exchange an authorization code for an access token (and refresh token)
- The redirect URI is where the user gets sent after a successful authentication
- The scope variable is what scopes to request from the IdP
Generate a PKCE Pair
We next need to generate the actual code verifier and code challenge.
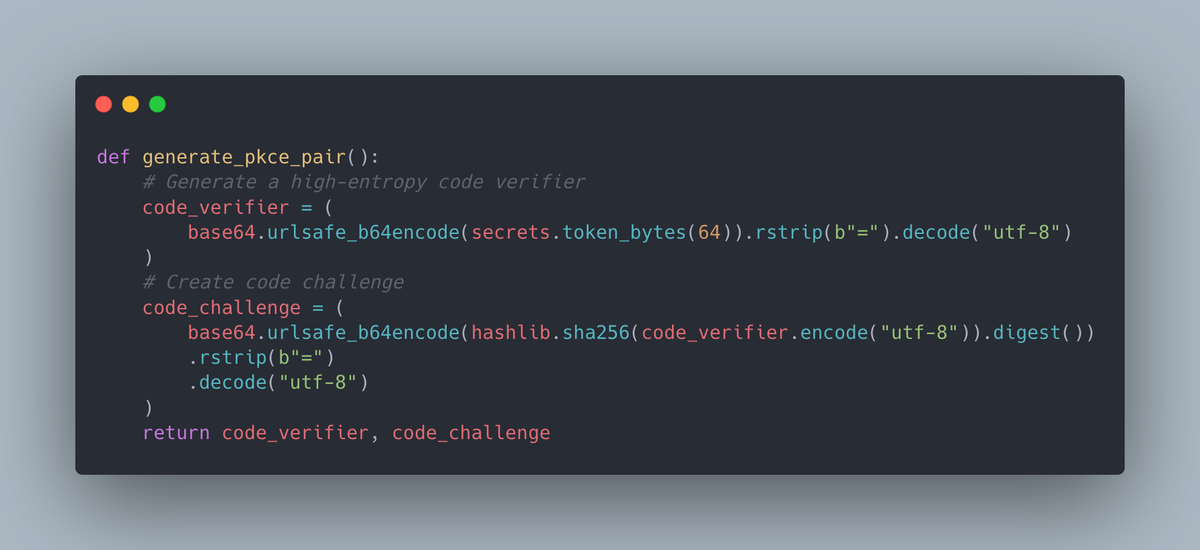
def generate_pkce_pair():
    # Generate a high-entropy code verifier
    code_verifier = (
        base64.urlsafe_b64encode(secrets.token_bytes(64)).rstrip(b"=").decode("utf-8")
    )
    # Create code challenge
    code_challenge = (
        base64.urlsafe_b64encode(hashlib.sha256(code_verifier.encode("utf-8")).digest())
        .rstrip(b"=")
        .decode("utf-8")
    )
    return code_verifier, code_challenge
This function returns two values - the code verifier and the code challenge. It generates a 64-byte secret, then base64 encodes it. Then, it base64 encodes the hash of the verifier, to produce the challenge. This is the most important step in the whole flow - it uses the difficulty of reversing a cryptographic hash to guarantee that only the process that knows the verifier can exchange an authorization code for an access token
Creating the OAuth2Session Object
We need to create an OAuth2Session object to contain all the relevant values during the exchange.
code_verifier, code_challenge = generate_pkce_pair()
# Create an OAuth2 session
oauth = OAuth2Session(
    client_id,
    redirect_uri=redirect_uri,
    scope=scope,
)
It calls the generate_pkce_pair function, to create the values that will be used later. Then, we create the session object.
Start the Exchange
Next, we open a web browser to the authorization code URL created by the session object.
authorization_url, state = oauth.authorization_url(
    authorization_base_url,
    code_challenge=code_challenge,
    code_challenge_method="S256",
)
print("Open this URL in a browser and authorize:", authorization_url)
webbrowser.open(authorization_url)
This code creates the authorization URL, passes in the code challenge, and opens it in the web browser.
Get the Response
We then ask the user to input the URL that they were redirected to. This is because we don't want to run an HTTP server for the sake of this example.
# Get the authorization response from the user
redirect_response = input("Paste the full redirect URL here: ").strip()
Exchange Authorization Code for a Token
Next, we take the redirect response value, pass it to the session object, and let it parse out the values.
# Fetch the access token
token = oauth.fetch_token(
    token_url,
    authorization_response=redirect_response,
    include_client_id=True,
    code_verifier=code_verifier,
)
print("\nAccess token:", token)
This will fetch the token, provide the code verifier, and return a token object.
Putting it All Together
The entire contents of the script should look like this:
import base64
import webbrowser
import secrets

import hashlib

from requests_oauthlib import OAuth2Session

# Client ID, provided by Authproject
client_id = "client-f2655980a4574a01b6a501a20676651f"

# Base URL for authorization
authorization_base_url = "https://<your-auth-domain>/oauth2/authorize"

# Token URL for exchanging authorization code for access token
token_url = "https://<your-auth-domain>/oauth2/token"

# Redirect URI registered with the OAuth2 provider
redirect_uri = "https://localhost:9000/callback"

# OAuth2 scope (optional, depends on your server)
scope = ["openid", "profile", "email"]


def generate_pkce_pair():
    # Generate a high-entropy code verifier
    code_verifier = (
        base64.urlsafe_b64encode(secrets.token_bytes(64)).rstrip(b"=").decode("utf-8")
    )
    # Create code challenge
    code_challenge = (
        base64.urlsafe_b64encode(hashlib.sha256(code_verifier.encode("utf-8")).digest())
        .rstrip(b"=")
        .decode("utf-8")
    )
    return code_verifier, code_challenge


def main():
    code_verifier, code_challenge = generate_pkce_pair()
    # Create an OAuth2 session
    oauth = OAuth2Session(
        client_id,
        redirect_uri=redirect_uri,
        scope=scope,
    )

    # Get authorization URL and state
    authorization_url, state = oauth.authorization_url(
        authorization_base_url,
        code_challenge=code_challenge,
        code_challenge_method="S256",
    )
    print("Open this URL in a browser and authorize:", authorization_url)
    webbrowser.open(authorization_url)

    # Get the authorization response from the user
    redirect_response = input("Paste the full redirect URL here: ").strip()

    # Fetch the access token
    token = oauth.fetch_token(
        token_url,
        authorization_response=redirect_response,
        include_client_id=True,
        code_verifier=code_verifier,
    )
    print("\nAccess token:", token)


if __name__ == "__main__":
    main()
Note that I have wrapped the main code in a function, which is called only when the script is being run interactively.
Output
The output of the script should look like this:
Open this URL in a browser and authorize: https://<your-auth-domain>/oauth2/authorize?response_type=code&client_id=<client-id>&redirect_uri=<redirect_uri>
Paste the full redirect URL here: https://localhost:9000/callback?code=<authorization-code>&state=<state>

Access token: {'access_token': '<access-token>', 'expires_in': 7200, 'id_token': '<id-token>', 'refresh_token': '<refresh-token>', 'scope': ['openid', 'profile', 'email'], 'token_type': 'Bearer', 'expires_at': 1754238405}
Note that I have removed the actual values, so your output may be considerably longer than is above.
Want to get started with Authproject?
Visit Authproject to get started!